
Hello!
You probably landed here because you want to try your hand at “vibe-coding”.
Or maybe you’ve landed here because you’ve tried “vibe-coding” and you got so-far and now you’re stuck with bugs and have given up.
Whatever your reason, here’s a guide to building web applications with “AI” (LLMs).
What is “vibe-coding”?
This is the (sometimes pejorative) term used to described coding with AI. It started off as you could just describe what you wanted to build and the LLM would generate code to implement this, without you needing to touch or understand the code. Basically AI turned everyone into a script-kiddie.
At first, people were using AI chatbots to generate code they then pasted into files and ran. Then models were trained to run in a more “agentic” mode, where they keep iterating until a solution is reached or you run out of token context or the whole thing turns into a bin fire. Then these models were integrated into broader systems like Cursor, Claude Code, and Codex. The last wave, within the last year or six months has been complete platforms for vibe coding, like Devin, GitHub CoPilot, Lovable, or Google AI Studio. I look at some of these in this post.
Counter-intuitively, the better you are at programming the more you can actually get out of these platforms. Knowing the right instructions, being able to debug, making architecture suggestions – if you are good at this, then the LLMs respond to that and you get better outputs.
Starting Off
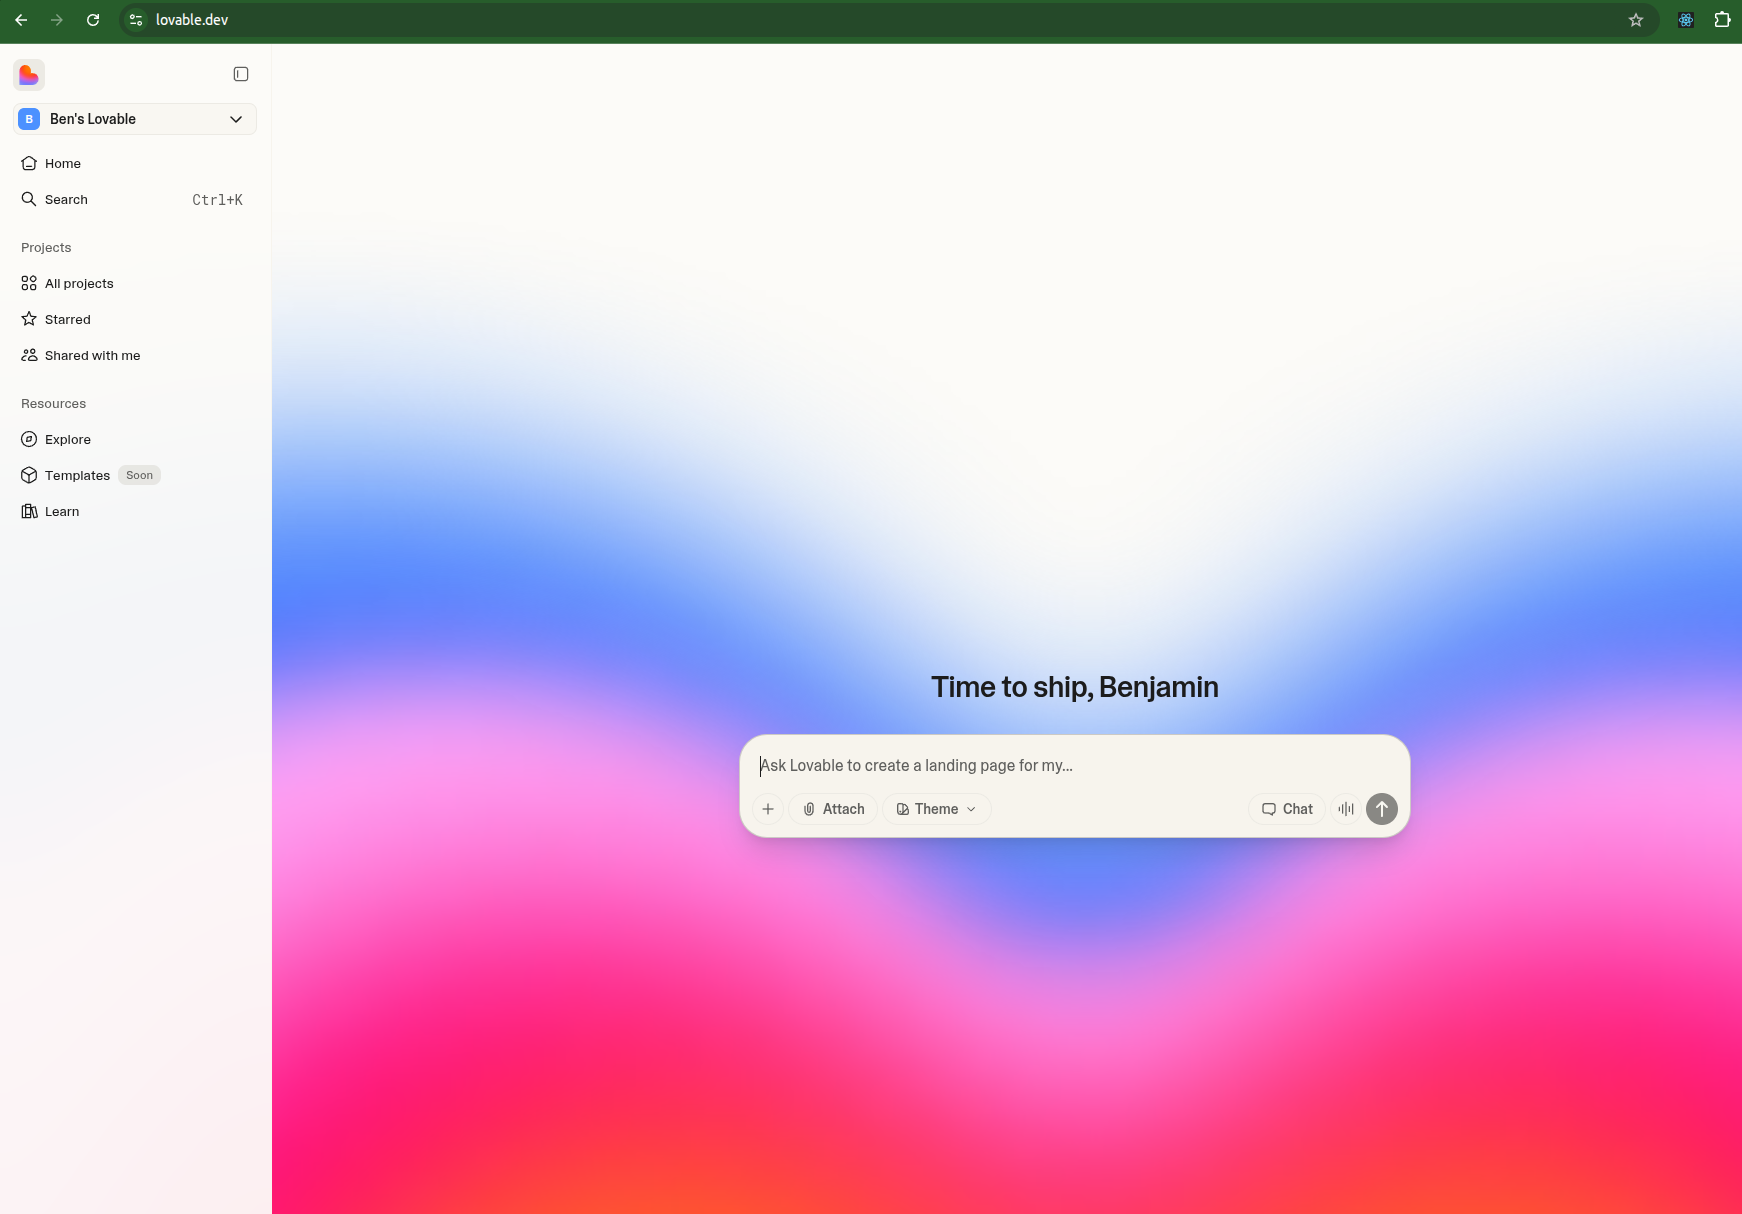
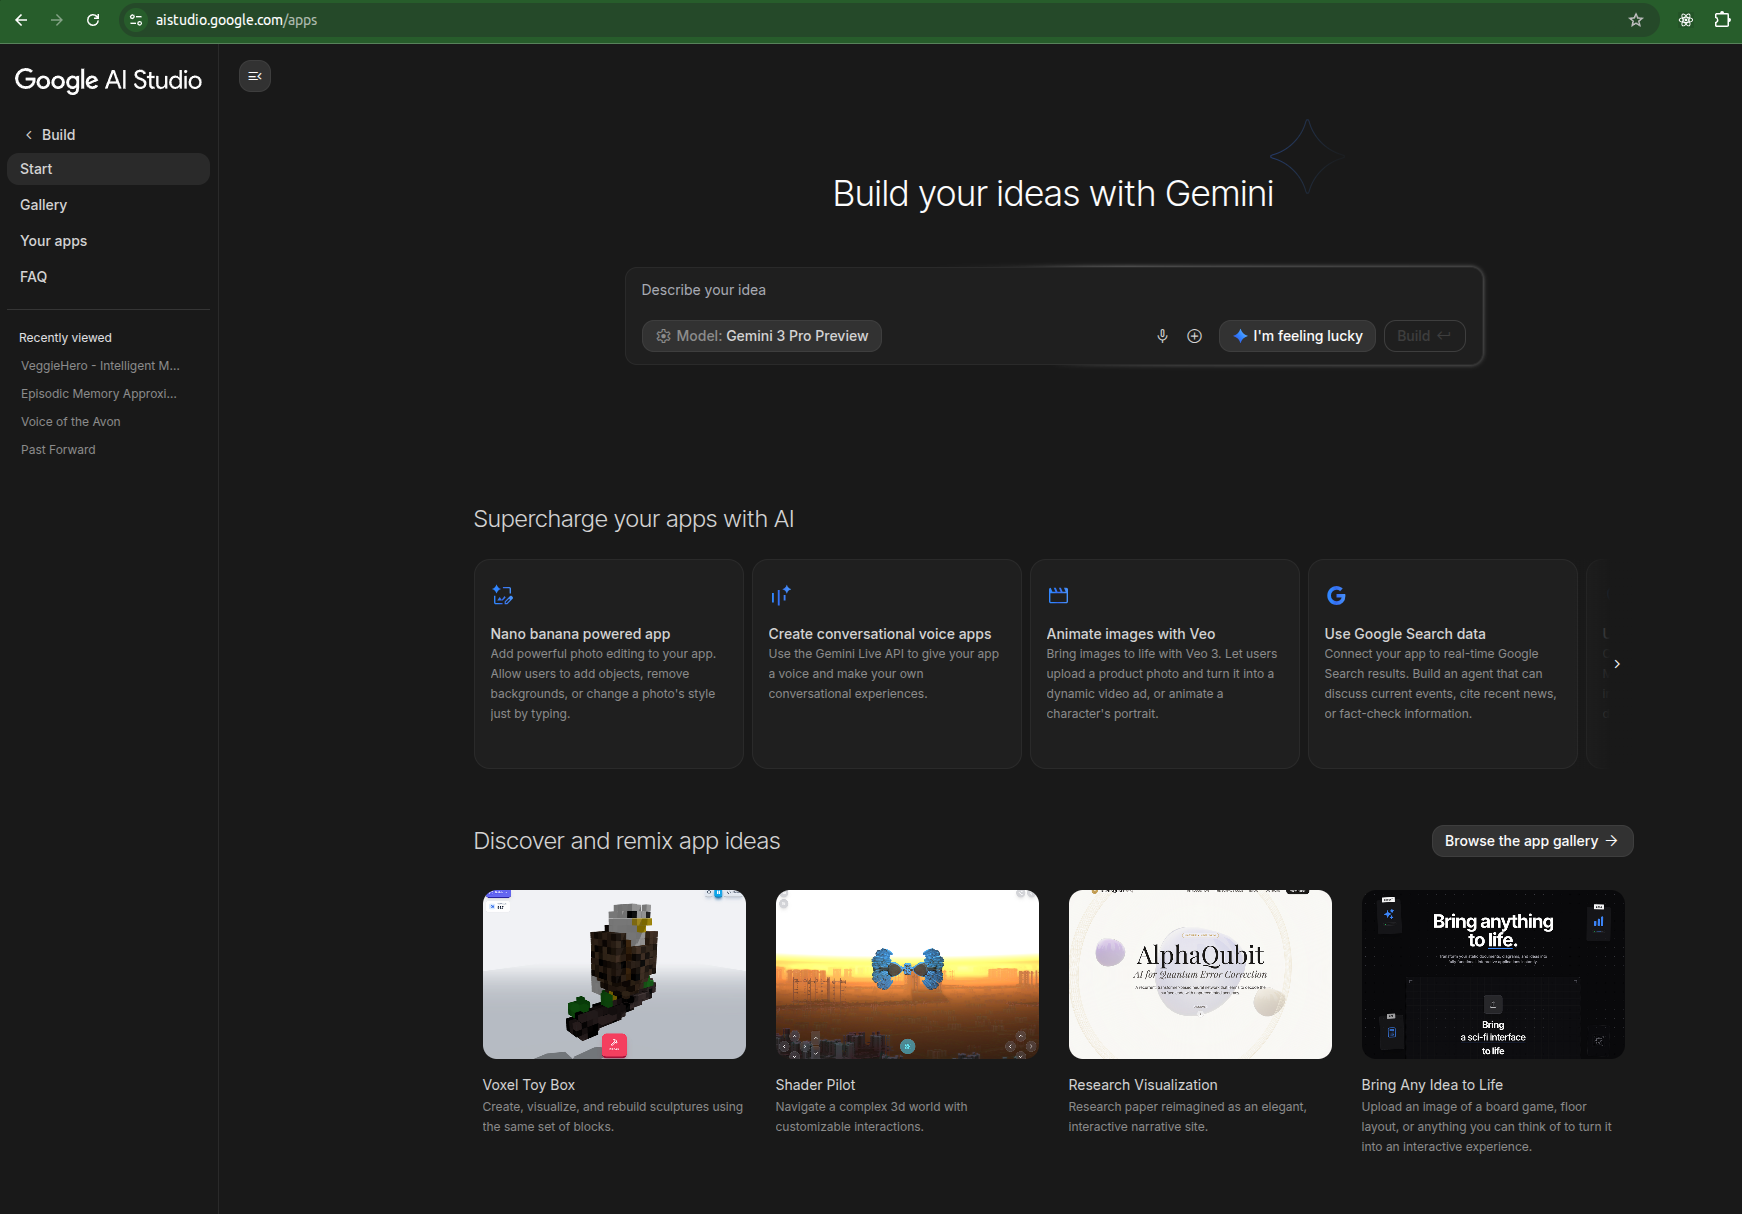
I recommend starting off with Google AI Studio “Build” or Lovable. These offer the most for both user friendliness for newbies and “no hassle” for more experienced folks.
Lovable is £20/month but has a few more tuned-user-friendly features. They are pretty similar in capabilities. Google AI Studio is free and you can just plug in a paid-for API key (that normally costs pence per request). Lovable is easier for publishing – just click “Publish” and you have a deployment. Deployment via the Google Cloud and Google AI Studio is dicier.
Both build a React and Typescript front-end according to a common template. Do a few of these and you get a feel for the structure. JavaScript is about 10x as verbose as any other language (well maybe apart from C or Java), so as complexity grows it can get harder to work out what is going on and where.
My general journey to starting is as follows:
- Take notes
- Discuss with AI
- Use an AI build tool
- Iterate
- Publish
1. Take notes
Take notes on ideas as they come during the day.
You often can’t control when inspiration will hit – it normally comes when I am doing something else, so I briefly note it down to come back to it later.
Outcome: note on my phone.
2. Discuss with AI
When I’ve got a bit of time, I take an idea and discuss with an LLM. I prefer ChatGPT for discussions, I find it better for conversation. Claude is good for refining ideas as it can update project artefacts as you discuss. Claude Opus 4.5 is a good problem solver – I often use this for short “heavy-lifting” conversations.
Key here is to explicitly ask the AI not to write any code, but to use it to sketch out and refine the idea. It will normally want to jump in with code. Be stern. You can also drop existing materials in here for inspiration.
I have found Claude Opus 4.5 brilliant for helping sketch out a plan. In fact I asked Opus 4.5 to generate, as an update-able project artefact the following:
- a plan for the app –
xxxx-plan.md - a design choices record –
xxxx-choices.md
I could then download these or add them to the project materials and use them to seed other chats.
Outcome: sketched one-page plan.
3. Use an AI build tool
Use Google AI Studio or Lovable to build an MVP based on the sketched one-page plan. This often involves just copying and pasting the plan developed at step 2) into the chat window. If you don’t have a plan, just describe your idea in as much detail as you can. It does work best though when you have the chat about what you want to build at step 2) before you actually build. Often you won’t know what you want.
Outcome: initial app you can play with.
4. Iterate
Iterate via the Google AI Studio or Lovable chat.
The one-shot attempts are in my experience pretty damn good, especially if you’ve already thrashed out the detailed thinking in 2). Definitely better than anything I could have done from scratch and the style choices etc. are “good enough” for me; better than I can immediately think of in the moment of building anyway.
Normally, the iteration here is for features – stuff that needs expanding. Normally, the LLM will produce a simplified but manageable version of your original idea and here you put back in as much complexity as it can handle to get close to a workable version of the initial idea.
Outcome: improved app you can play with – closer to your original idea.
5. Publish
Get something published and out there.
Often you can iterate for a long time on 4). And the changes don’t always make the app “better”. More complexity often leads to greater instability. So I aim to only iterate until I’ve got something “useable” and “good enough”. Often this will lack, for example: users, DB persistence, multi-pages, and all my “nice-to-have” features. Both Google AI Studio or Lovable have a “publish” option. Lovable just “works” and gives you a custom Lovable sub-domain but does have that monthly cost.
Outcome: improved app available at a web address others can play with.
Syncing to GitHub
Once I’ve got the MVP up and ready, I like to sync to GitHub.
Both Google AI Studio and Lovable offer a sync to GitHub option but I found only Lovable really worked without fuss (in Google AI Studio, I couldn’t get the authentication to work).
Syncing to GitHub is good because:
- you can have a commit history as you update;
- you can clone the repository locally to test out and tweak; and
- you can then iterate using GitHub Copilot Actions.
If you want to use Google AI Studio and the syncing is not working, you can set up a blank GitHub repository manually, download the ZIP file of the code, extract it into the folder cloned from the blank GitHub repository, then git commit and git push.
The Curse of Long Context Drift
Now one lesser-known issue with using LLMs in coding sessions is that as the too-ing and fro-ing increases, the quality decreases. Confusion often creeps in, and errors can add up.
A better way is to get to certain workable checkpoints, then iterate around those, aiming for modular features that can be mostly one-shotted with an appropriate prompt.
With vibe-coded apps generated using Google AI Studio or Lovable, you’ll often hit a point where if you try to iterate more things break more and you go backwards rather than forwards. At this stage we need to move out of the Google AI Studio or Lovable environment. At this stage I move onto coding using GitHub CoPilot.
GitHub & CoPilot Iteration
Since September 2025, I’ve seen GitHub CoPilot go from a toy to be a great usable product. I’m very worried they will brick it at some point but so far it’s well worth the costs.
There are lots of different ways you can use the built-in LLM tools. I started out over a year ago with the LLM-autocomplete in the IDE (PyCharm integration). That was slightly useful but I didn’t really use it in the end. I’ve also played around with Cursor but I found that needed too much configuration overhead and knowledge of VS Code keyboard shortcuts for my liking. I’ve also used the GitHub CoPilot chat to discuss files and quick bug fixes in the IDE – you can explicitly drop in the file where the bug occurs and the error message and say to Sonnet 4.5 “fix this” with your (optional) take on what is going wrong.
Since September 2025, GitHub have added an option to “Assign”
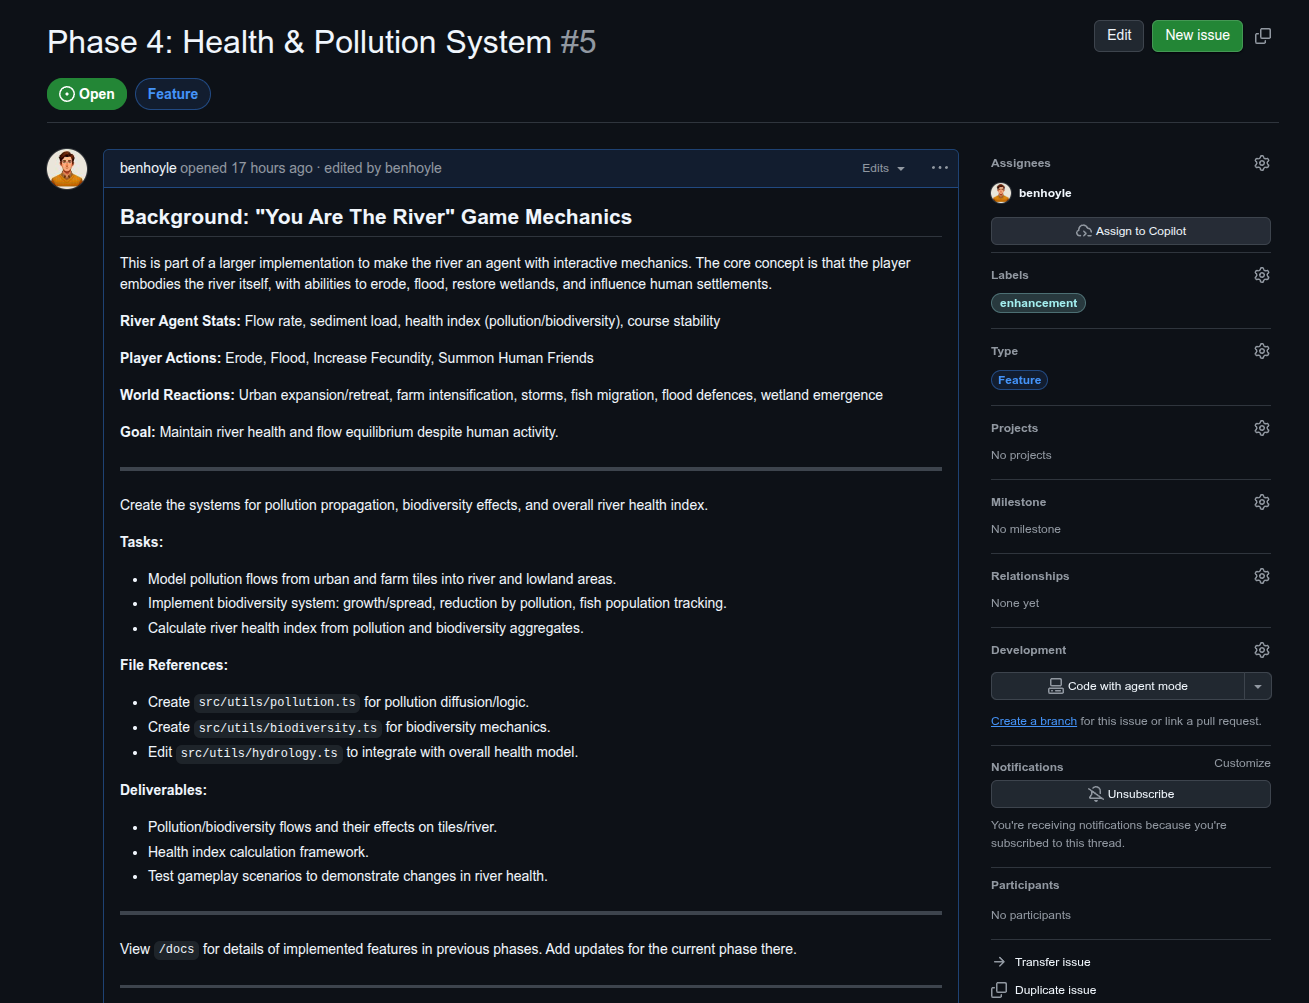
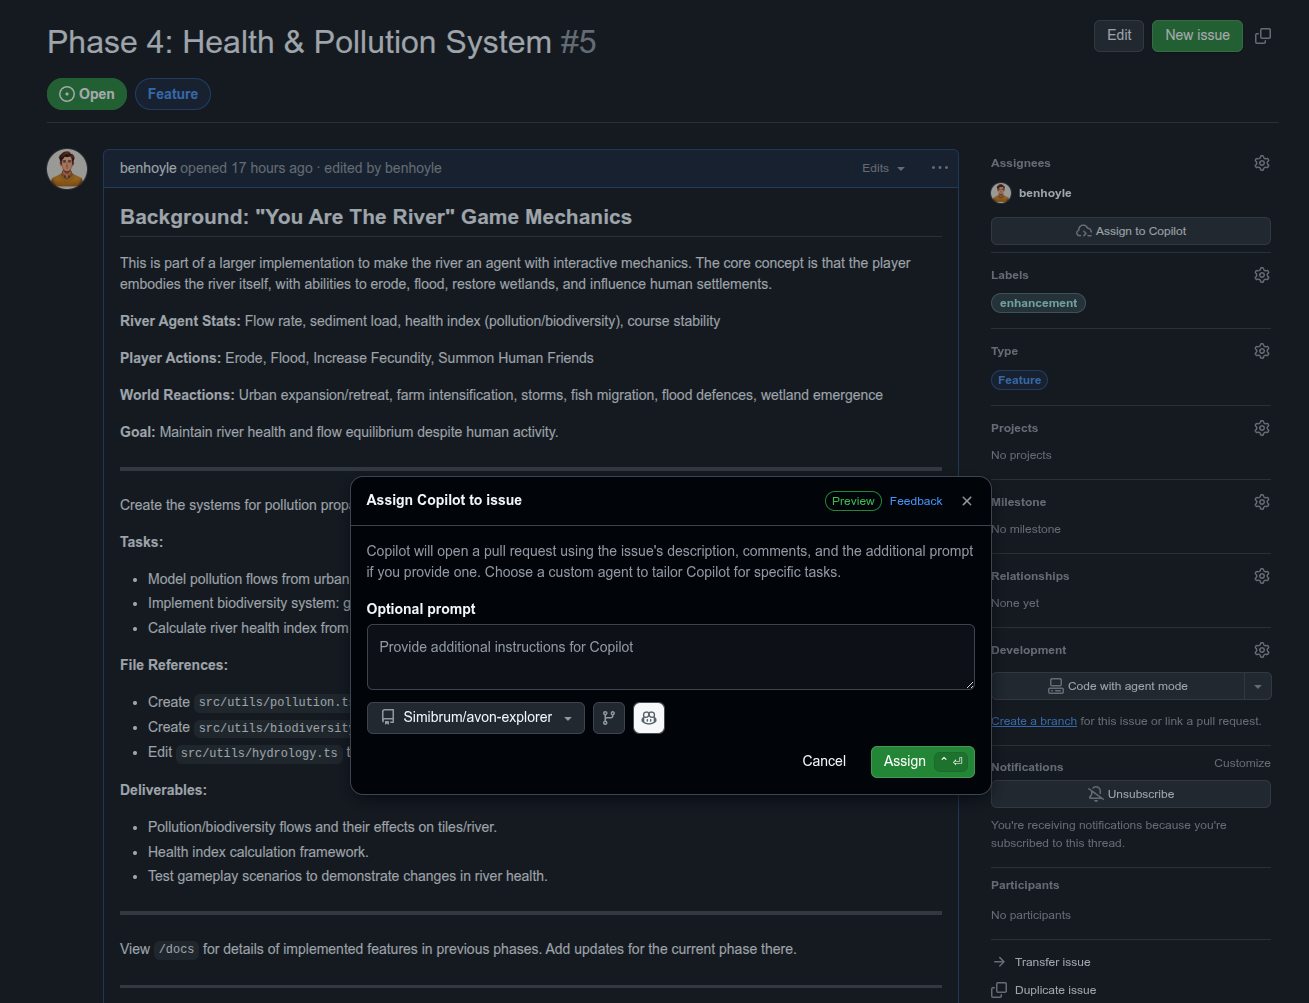
I found Claude Opus 4.5 to be brilliant in generating issues and a plan of development. I could then just paste in each issue to create. The talented ones out there will release you could automate a Claude>Issue direct script using the Claude API and the GitHub command line or PyGitHub.
Here is an example prompt I gave Claude Opus 4.5. The “Coding Setup and Procedure” file is a copy and paste of the text of this blog post!
I’ve got the plan for a game set out in
*-plan.md(design choices in the longer*-choices.mdfile) and I am currently using AI for fast development as described inCoding Setup and Proceduretext file (all in project files).Can you help with a plan for coding this up, given the strengths and limitations of my coding setup?
Lovable or Google AI Studio is good for getting the initial code project up and for iterating on visual aspects but as soon as stuff becomes too complex we need to shift to modular development with GitHub CoPilot.
I’ve also tried some initial iterations of this game with both of those tools. An isometric version didn’t quite work – dynamics were too complicated as was the rendering. A 2D similar version worked a lot better, but elevation struggled to come across with 2D.
I guess we want to chat here about efficient architectures as well. I had another game that was tile based and the core logic involved iterating over an array of tiles (for x, for y loop). In the ML age it would seem more efficient to use matrices for game computations (e.g. matmul for state update). We can also use scaled matrices to efficiently work with sparsity. In another game there were a lot of updates to tiles where nothing was going on. I’ve found log2 hierarchies to work well for scaling. This also matches with the zoomed-in first person exploration/hunting/gathering and the zoomed-out generation mode.
I’d also like to prioritise the ease of me to understand dynamics. What worked well on the other project was separating out different game-play layers (e.g., different properties) into different files that could be run in parallel and we just have a central simulation/gameplay loop where we hook in to update. Also separating the rendering and UI from the game dynamics so you can tweak the game dynamics without needing to work on the UI files – just drop one file into an AI chat.
So what i’m looking for is an AI development plan:
- An initial prompt for Lovable or Google AI Studio.
- Loose directions to iterate on the UI using those tools to get an MVP and published.
- Start with minimal game dynamics but describe how those will be hooked it – start with a minimal exploration and entity-interaction dynamic.
- Start with the two-level scheme – get that looking suitable before additional game dynamics (e.g., left tech/evolve tree initially and hunting and interaction and events but configure the states to allow easy modular addition).
- Then suggest GitHub issue sequences that I can C&V into GitHub to work on different features. Aim for maximum independence of features so I can run some tracks in parallel.
- Instruct to write /docs and tests as we go.
Provide the prompt for Lovable or Google AI Studio as a first project artefact – initial_prompt.md.
Provide the issues for GitHub as a second project artefact – issues.md.
In reply Claude gave me output for a phase 1 and a phase 2. After using the initial prompt and completing phase 1 on Lovable, I pasted a screenshot and explained where we’d arrived at, and asked if we needed to update the issues for phase 2. I then created the issues in phase 2 using the update project artefact setting these out.
The Tech Stack & Debugging
I normally prefer coding things up in Python so when stuff goes wrong I’m less familiar with React and TypeScript. However, the more of these you play with the more familiar you get.
The tech stack for these vibe-coded front-end apps is:
- React – some people don’t like React, but I quite like it as it is Python-esque and allows good modular files and class-based rendering and iteractions.
- TypeScript – as far as I know, a flavour of JavaScript that allows data classes and type definitions. Basically, allows a Python-like set of class definitions to handle everything.
- Tailwind – a CSS framework for applying quick styling. Not a million miles away from stuff like Bootstrap back in the day.
- Vite – I think this replaces “Create React App” for serving and running the app. I see it as something like uvicorn for Python development. Create React App used to be used but is now depreciated.
After moving to a GitHub repository I like to add the following features that Google AI Studio or Lovable tend to skip for speed:
- Linting – using something like ESLint – just start an issue to be assigned to Copilot that says “Add Linting” (ask ChatGPT/Claude if you want more detail.
- Documentation – I’ve found coding goes much better if you get Copilot to document as it goes. The LLM reads the documentation so it’s as much for them as it is for you! Your future self will also thank you. I normally ask for everything to be generated as
.mdfiles in/docsfolder. Every so often I’ll clean this up by adding layers of folder structure. It’s best to keep the docs shortish – both for you and the LLM. - Testing – you can use a framework like Jest to add function tests as you go.
- CI/CD – once you’ve added tests you can ask CoPilot to generate a short build and test GitHub Action that can be run on every Pull Request. If you combine this with adding tests as you can go, this can help the agent detect and fix initial problems with the code without you spotting it.
- CoPilot Custom Instructions – on your first CoPilot led Pull Request there’s a little link you can click that says “Setup CoPilot”. This creates another issue with an onboarding that generates instructions for CoPilot based on the code you have already. You can put any pointers in that new issue (e.g., I normally past something similar to this list as desired requirements). You then assign to CoPilot and it bootstraps it’s own instructions. You can review and tweak in the web UI before commiting.
Time Scales
The MVP
1-2 hours via Google AI Studio or Lovable.
The power of the recent LLM models are their ability to “one-shot” a good solution as the first set of agent actions. Hence, from a decent prompt you can often get a MVP in 5-10 minutes sometimes.
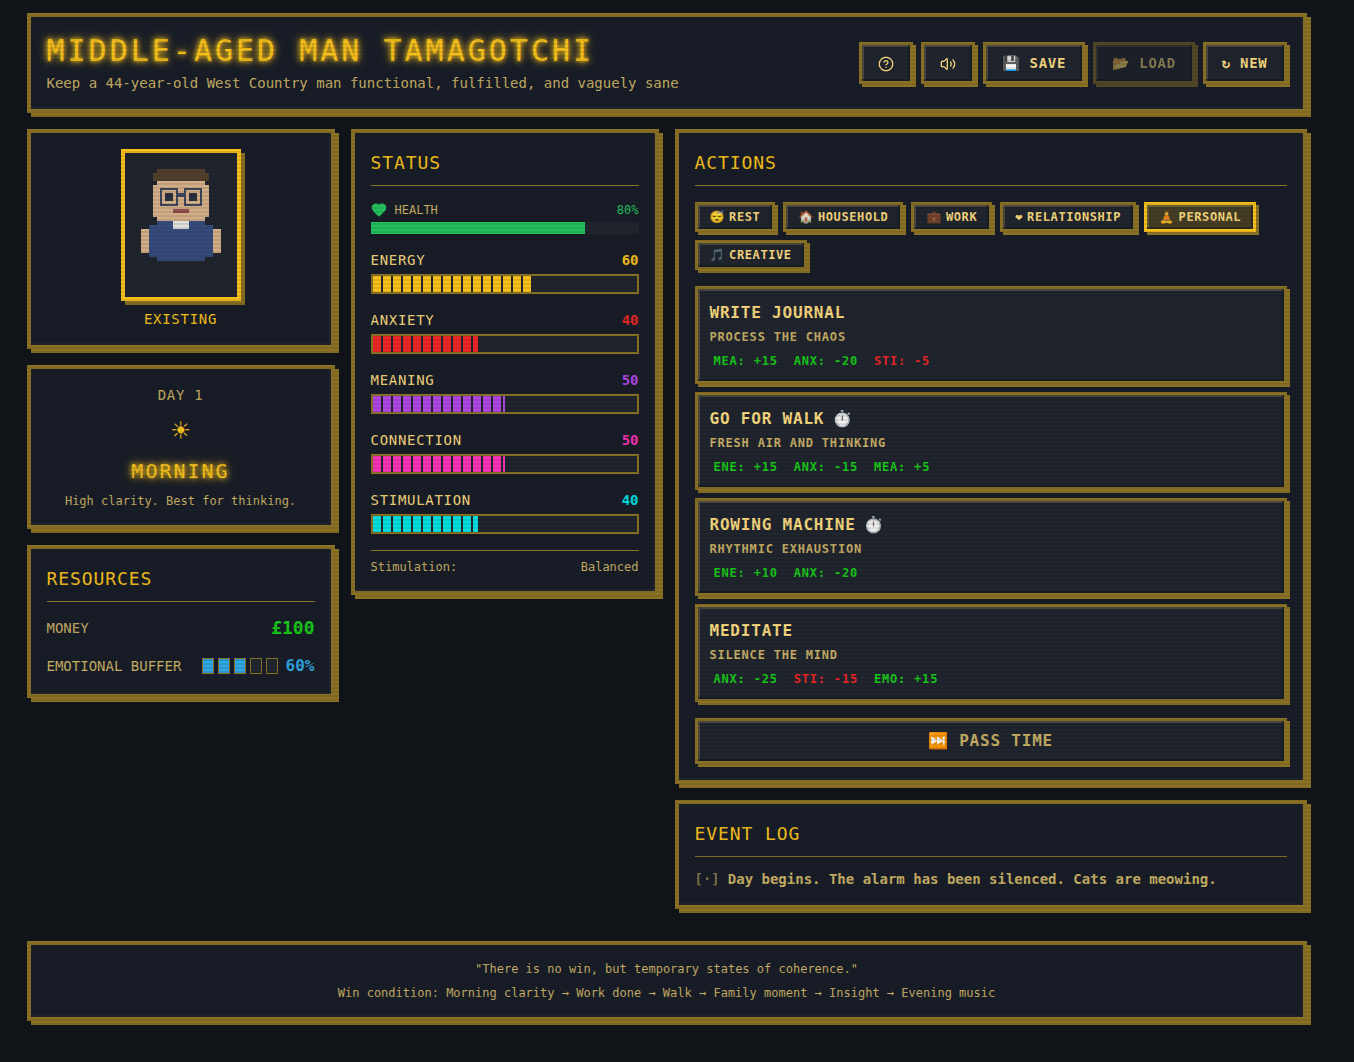
Here’s one of those MVPs – https://middle-aged-managotchi.lovable.app/
The Developed MVP
1-2 days via GitHub CoPilot Iterations.
Each GitHub CoPilot session takes about 15-30 minutes to work on the Issue before you’ve got something to test.
Viewing and replying to comments in the Pull Request chat takes 5-10 minutes (depending on complexity).
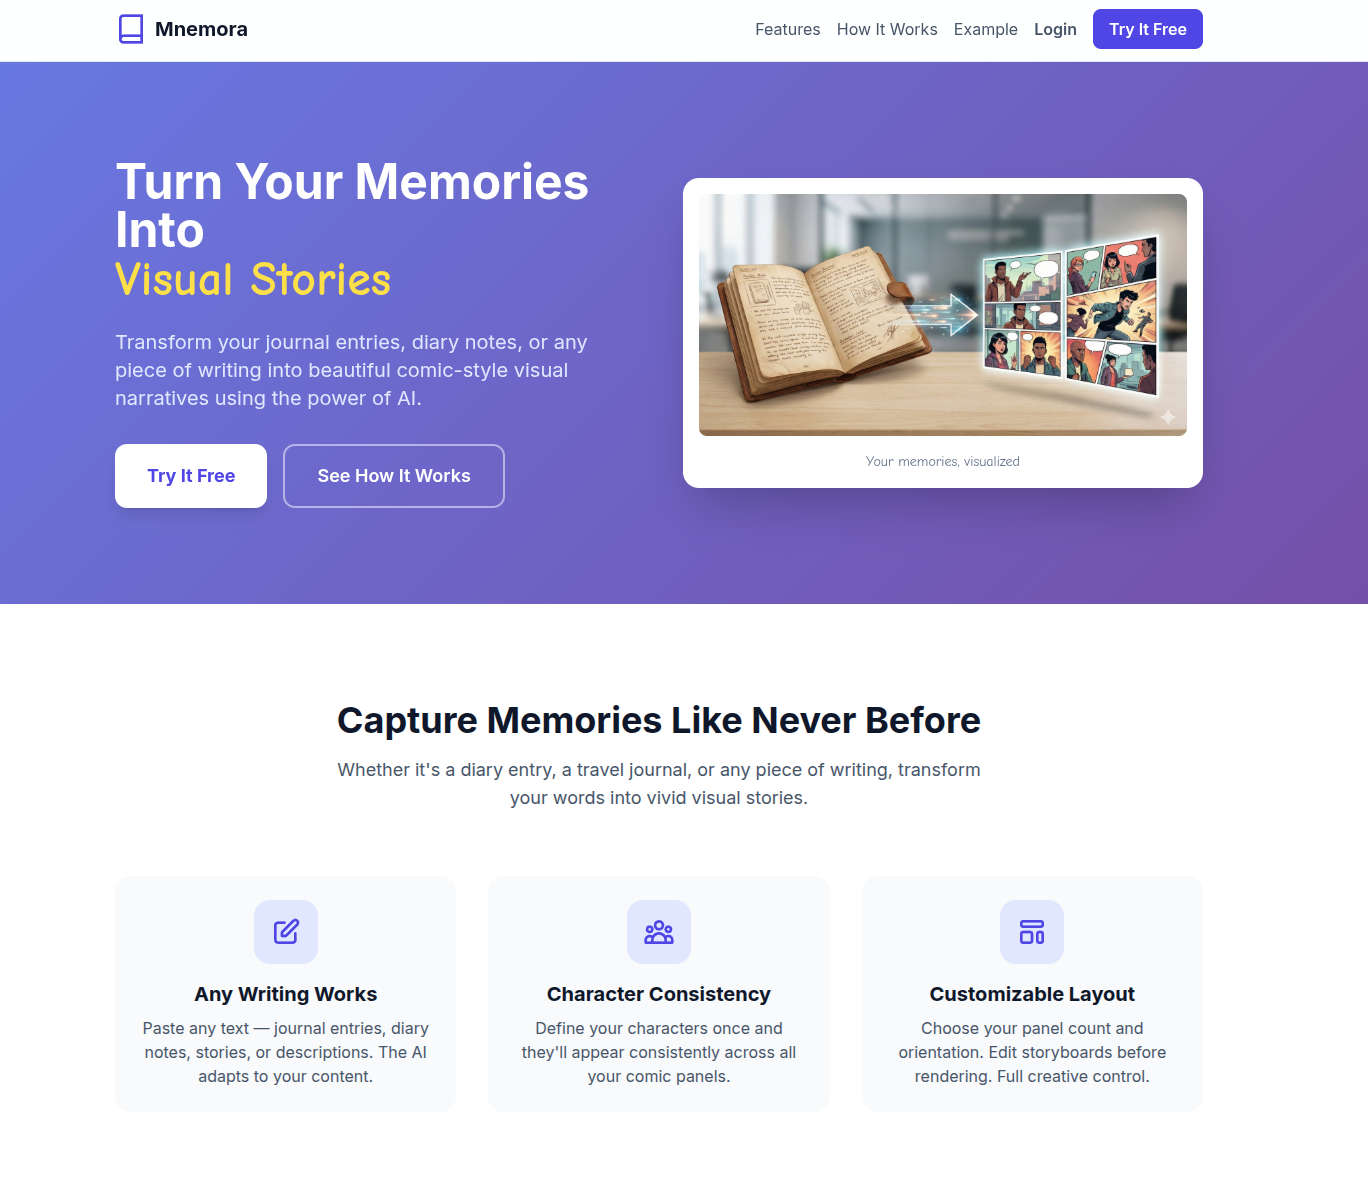
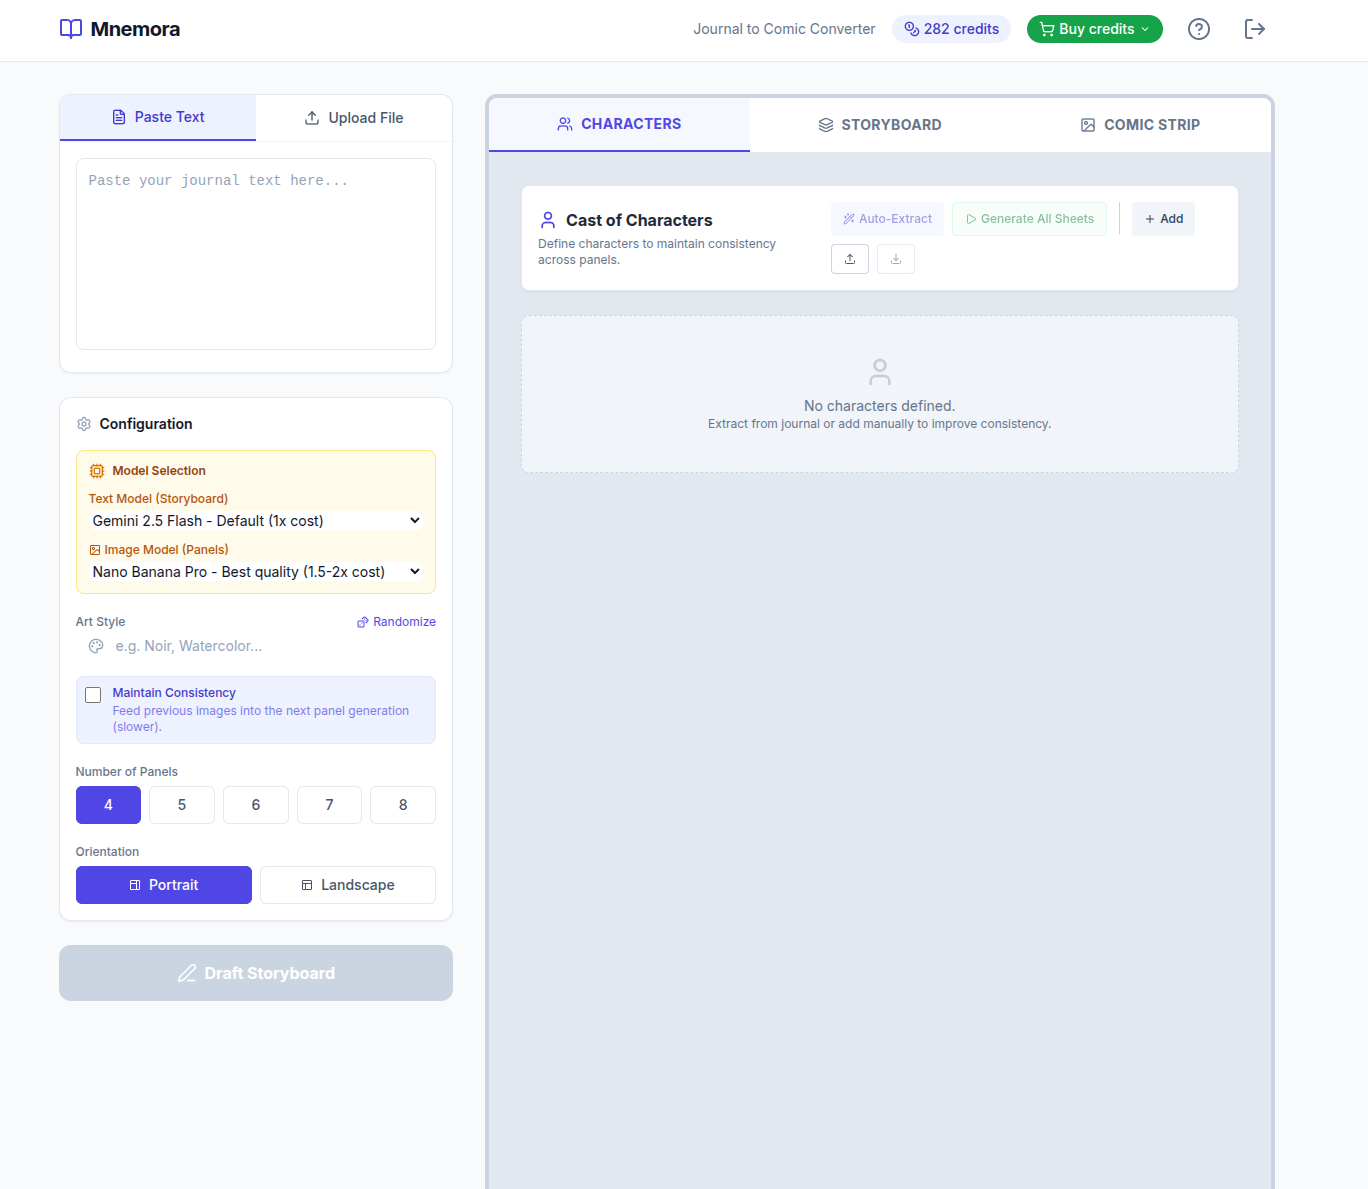
Here’s a more developed MVP – https://www.mnemora.art/
Users and Authentication
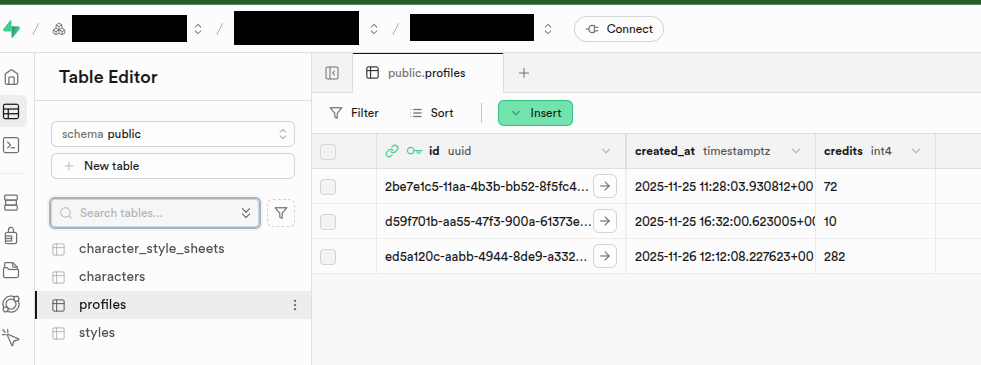
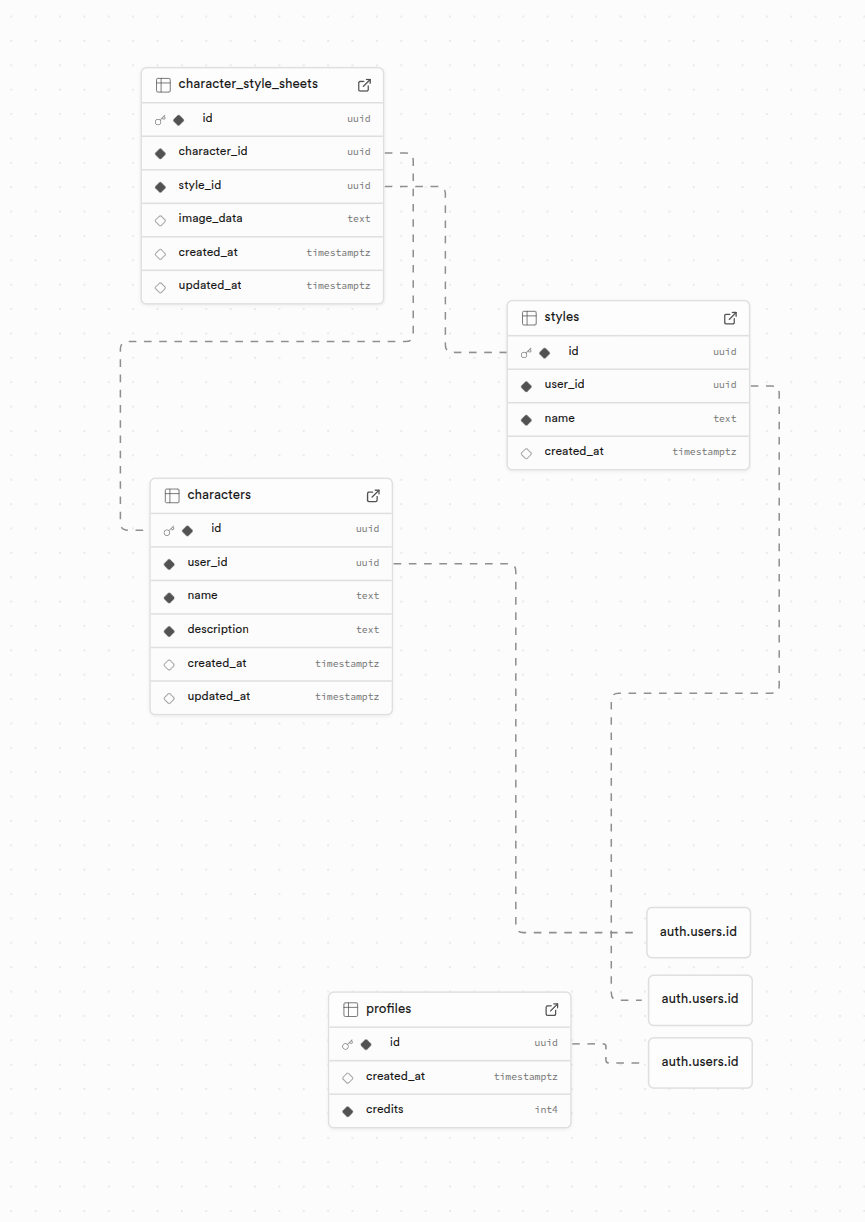
Normally I would set up a Postgres database for users and authentication, but it’s a big pain. Lovable integrates Supabase for users and the LLMs also recommended Supabase so I thought I’d give it a go. Supabase is basically a wrapper over a hosted Postgres instance where lots of the complexity is abstracted away. It has an authentication option that is easy to integrate (either via Lovable or Google AI Studio) and sorts out annoying fiddly bits like password hashing and email validation. I’ve been impressed so far.
Supabase also enables you to add tables. You can have a “alembic-lite” style interaction where you generate a /supabase folder then use the command line tool (I install as a development dependency via – npm install supabase --save-dev). This enables you to set up migrations, which can be as simple as pushing chunks of SQL schema generated by the LLMs. There are I think more complex “up” and “down” migration roots but I haven’t got into that yet.
Supabase also requires you to implement row-level-security (RLS) so you need to instruct the LLM to provide the rules for this with the schema updates.
Supabase has a nice UI with lots of options for settings things up, that’s nicer that your standard raw Postgres instance on Azure or AWS. You get a couple of projects for free and the paid plan is only £20/month. It’s worth it for avoiding the normal DB headache for small projects. There’s a nice table editor as well, which is useful for making quick changes and fixes if you need to.
Deployment
Both Lovable and Google AI Studio offer a “publish” option to deploy your app. I could only get Lovable’s to work reliably without fuss. Lovable give you a nice URL and some publishing options. This is often enough for small scale apps. However, I’ve found as apps get more complex and I need a layer to manage updates and more complex feature deployments that I need a more professional deployment option.
Now I’ve used AWS, Google Cloud, and Azure in the past. I’m not really a fan of any of those – too much overhead for what I need to do, too many options. They seem designed with in-built complexity so you accidentally spend.
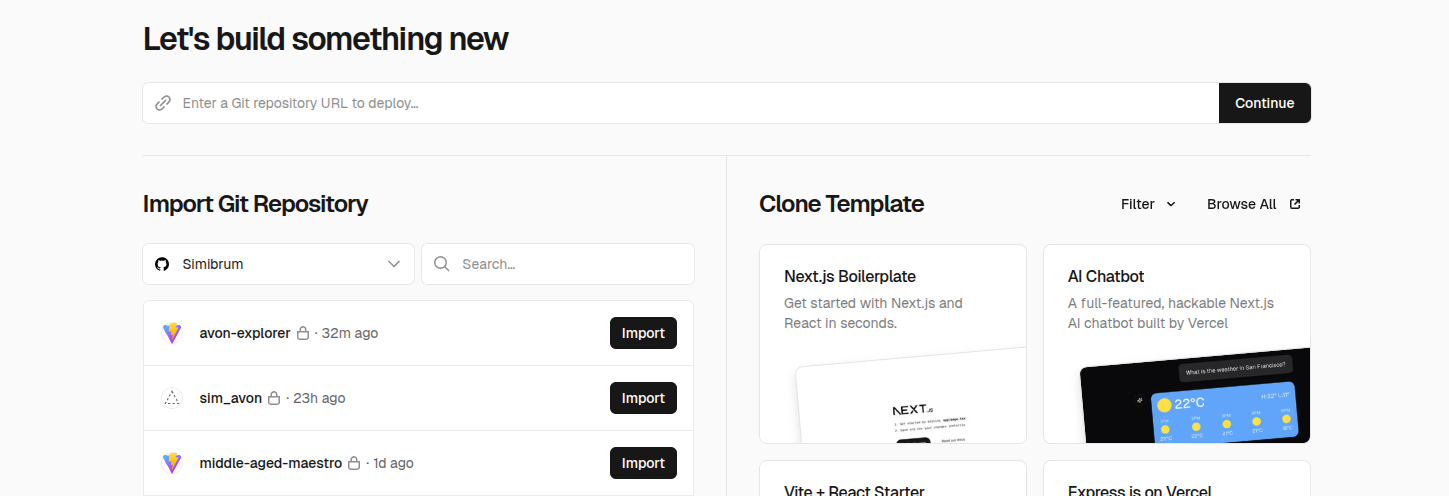
For “vibe-coded” apps, I’ve found Vercel to be a great deployment option. It does cost $20/month but it does “just work”, and support multiple projects. Integration is a breeze – you just go to “Add New…” and click “Project” then select “Import”.

The deployment will then run off the repository. I haven’t had a problem yet – the app is up and running at a [myapp].vercel.app address, accessible to the public.
Using Vercel allows you to set Environment Variables and link with a domain. For a few apps, I’ve bought up a £3-10 domain for a year and linked it up in the settings.
The cool thing about Vercel is you get automatic deployments for Pull Requests. Hence, you can test out those GitHub CoPilot edits on a staging version before deploying properly. Merging to main/master then automatically deploys to the production version (and all this is configurable if you need to get into the specifics). I like the fact that this just works and it’s worth the money just to speed me up.
You can also have different environments with different Environment Variables. I’ve found this useful when using Stripe integrations – I can link Stripe Sandbox accounts to the development and preview environments and so avoid testing on the live Stripe integration.
Getting Paid
At some point you might need to monetise your experiments. Often I need to do this if using “AI” API calls as I need to cover the underlying cost of the API calls when a user is using a web app with “AI-powered” function (e.g., pay Google/OpenAI/Anthropic etc).
The easiest way to do this has been to use Stripe integrations. Stripe is the leading payment provider so it has the biggest body of support documents and general human know-how. Hence, the LLMs are fairly good at advising on integrations and gaps can be filled with the Stripe documentation.
To work out costings I chatted with a Chat LLM and got them to generate me a spreadsheet. They were actually a little shit at the calculations, but the spreadsheets were easy enough to adapt and correct. You want to factor in the API call costs, the number of calls, the model used, the hosting costs (e.g., Vercel and Supabase subscriptions), how you are factoring in the development costs (your time, GitHub charges, LLM subscriptions), VAT (if you are a company and charge it), Stripe’s charges, and a profit margin. I’ve found the chargeable costs to often be at least 2x the underlying LLM API costs in order to cover your own costs. But this can still be 10p per function level.
The “credit” system seems applied by most providers these days. You can setup simple products and pricing in Stripe to cover “credit” bundles (e.g., 10, 50, 100 credits). If you are that way inclined, you can also add recurring payments – subscriptions – and you can bundle a certain number of credits into monthly top-ups for subscribers. Stripe make this all very easy to do.
Tips
Here are a few tips for this setup:
- Don’t get ahead of yourself
- Use GitHub Pull Requests to Test Before Merging
- Do Stuff in Parallel If You Can
- Watch Out for Rate Limits
- Squash and Merge
- Use Sketches and Annotated Images
- Get the LLM to Generate Your Landing Page
- Use GitHub Issue Relationships
- Prioritise Feedback – One Thing at a Time!
- Add Debug Lines as Standard
Don’t get ahead of yourself
Try to keep issues to one bounded modular enhancement.
I like to start by chatting with an LLM to sketch out functionality and have this messy backwards-and-forwards chat within the chat window rather than in the AI Build App or GitHub.
Typically, a feature can start as a stream-of-consciousness text paragraph that I paste into the LLM ChatBot and ask to help me refine the idea and pick out a minimum implementation and additional features, as well as a development program. With GitHub CoPilot you can have this chat with your repository files included. I then add the minimum implementation as a first issue and the additional features as sub-issues. This then allows bounded, modular development that is more likely to stay on track. Often I will have common text across all the issues to describe the general feature (or have this added as an .md file for reference) and then specifics for each issue.
What doesn’t work as well is just posting that stream-of-consciousness text paragraph straight into the Build App chat window or the GitHub Issue. It does often work, but if there are ambiguities and different options you’ll find the app developing in ways you don’t want, and then roll-back is tricky.
Use GitHub Pull Requests to Test Before Merging
Another reason I switch to GitHub is that within the AI Build Apps, it is often difficult to rollback functionality. Once you type in the chat window the AI agent goes off and updates your app and you then have much more iteration to get things back the way they were or to fix errors.
With GitHub CoPilot, CoPilot will create a branch and a pull request and all the changes will be in there. Like a normal human-driven pull request, you can review the files, check locally, suggest tweaks.
In the worst case, if the updates introduce bugs that are difficult to fix, introduce unnecessary features, or go in a direction that you don’t like, you can always close the pull-request without merging. I then copy the original issue, amend with what I’ve learnt from the trip down the wrong forking path, and try again with extra steerage. This often works well.
Do Stuff in Parallel If You Can
Given the time needed by CoPilot to develop features, I tend to use chats with ChatGPT or Claude to suggest a development plan that maximises parallel implementations. I can then assign multiple issues to CoPilot to develop in parallel. I can then also be debugging or reviewing one Pull Request when others are in motion.
Occasionally you’ll get clashes but that is what git is designed to sort. Then I normally fetch the branches for the pull request locally, manually merge an updated main, then fix the merges in an IDE like PyCharm or VS Code, before pushing to the Pull Request branch again. Sometimes, the clashes can be fixed in the GitHub Web Editors.
Documentation and testing are two things that can often be performed in parallel with everything else.
I found the GitHub rate limits (see below) could cope with two issues being coded up in parallel without hitting problems. An approach I tended to take thus involve setting off two issues that could be parallelised, having a cup of tea or doing something else for 20 minutes. Then when they are complete and I’m reviewing kicking off another one and then feeding back and iterating on each in sequence (so there were only two agents at any time working at once).
Watch Out for Rate Limits
If I have multiple complex CoPilot sessions running at once I find I can sometimes hit rate limit messages. This is maybe a reason to work on complex features sequentially.
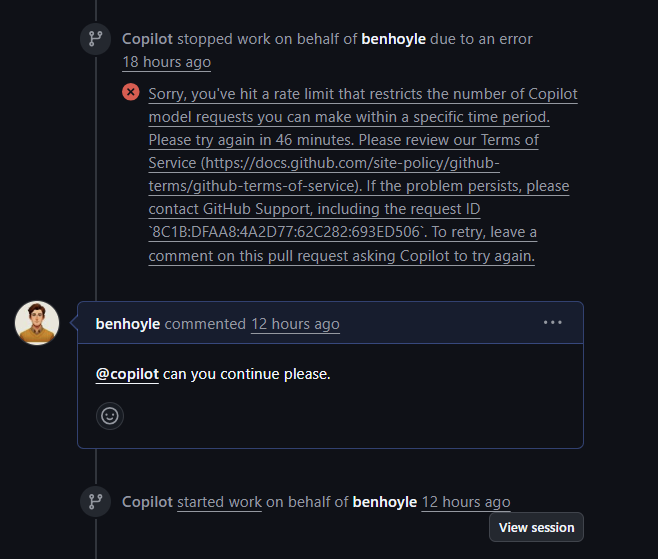
These seem to possibly be time dependent – I tend to hit them in the afternoon in the UK. They also tend to occur in Pull Requests where a discussion has been going on – so contexts may be filling up. If things are working – sometimes it is best to merge to main or a custom branch then start again with the last comment and a “fix any outstanding issues” message.
I found in the UK I only really hit rate limit problems when the US woke up (so around 3pm). My advice if you are not in the US is to get AI coding in the early morning and finish up by 3pm!
I found I often tended to hit rate limits on Pull Requests where I had more than two or three comments – something about iterating too much in the PR stream seemed to be maxing out the token counts.
Hitting rate limits also tended to bring in bugs as the coding sequence was interrupted halfway, causing bugs and then me commenting on those bugs caused more work to hit rate limits in a negative spiral. I haven’t yet hit rate limits on the build issue coding run.
My advice here is thus if you hit bugs that can’t be fixed by one message, and you keep to two agents running at once, take the code and go and see ol’ Claude Opus 4.5 and ask him to fix the problem. Then patch the fix manually or paste in Claude’s comments and solution into the GitHub Chat.
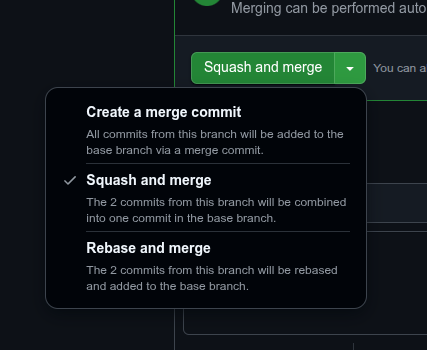
Squash and Merge
Embarrassingly I only found out this was an option recently.
Within git, and especially when managing Pull Requests within GitHub, there is a “Squash and Merge” option that squishes all the commits on the branch associated with the Pull Request into a single commit. I’ve found this great because normally I like to think of each feature or improvement as an atomic commit yet in the testing and tweaking there are normally a handful of small, “bitty” commits when you are just fixing things. Ideally, those little things should be fixed from the start but “Squash and Merge” enables you to implement this fiction.
Having a single commit per Pull Request per feature then makes audit trails and roll-backs much easier. To be fair, it seems more in line with how git use is envisaged in all the tutorials, so it’s weird people don’t shout about it more.
To implement it, select the little dropdown on the “Merge” button in GitHub and select the second option.
You can also implement via git merge --squash but I find the UI is a better experience for guiding me through the steps without needing to know all the GitHub syntax.
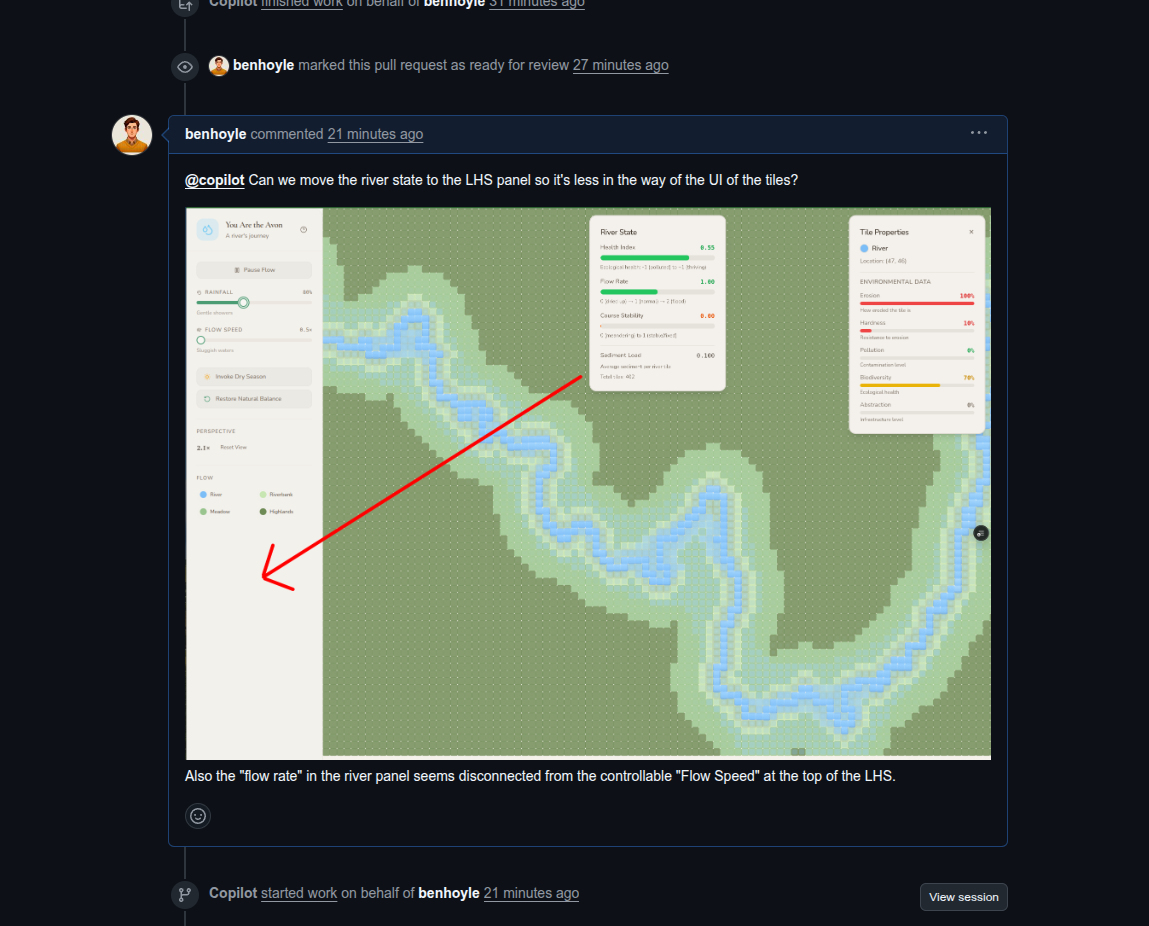
Use Sketches and Annotated Images
The really cool thing about all modern LLMs (including Google AI Studio, Lovable, and GitHub CoPilot) is that they are multimodal.
When you are starting out, if you have opinions or ideas about how you want your app to look – sketch them on a piece of paper, take a picture with your phone, and then upload the picture into the prompts.
Once your app is going, use annotated screenshots of the app to easily explain what you want changed.
Here’s an example below of me asking to relocate that UI pane at the top and the adjusted UI.
Get the LLM to Generate Your Landing Page
Lovable and Google AI Studio generate typical one-page React apps. What’s quite cool is once you setup in GitHub, you can create an Issue to generate a landing page with asset placeholders and it will go away and do it.
Use GitHub Issue Relationships
I’ve only just found out about these. They are located in the right-hand-side of the issue page. You can add “parent” issues, references to issues that “block” the current issue (“blocked by”) and other issues that are blocked by the current issue (“is blocking”).

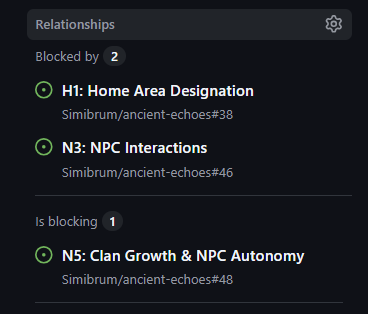
What’s cool is that you can get Claude Opus 4.5 to come up with these dependences and then just enter them in (the wise will also know how to automate this). It’s a great help when implementing a program of issues as you can then have a way to see what to send in for assignment to CoPilot next once a Pull Request has successfully merged.

I’ve yet to work out how to filter to only show issues that are not blocked (I could only see to filter based on having or not having blocking properties). If anyone knows how to do that, please let me know in the comments.
Prioritise Feedback – One Thing at a Time!
Similar to the comment above about leaving too many comments in a PR chat, I’ve also found that LLMs work best when given one clear task at a time with one clear outcome.
For example, often I’ve found a bug in an implemented feature and noticed the tests or linting aren’t passing. The temptation is to put these both into the same comment as feedback. While CoPilot can cope with this, it works better if you provide the bug feedback first, get that fixed, then make a comment about any failing tests. That way each comment has a clear thing to fix and a clear outcome of what “fixed” looks like. LLMs are much like human beings in this regard.
Add Debug Lines as Standard
This is one worth adding to the custom CoPilot instructions. I’ve found that GitHub CoPilot generally omits logging lines by default. Through trial and error I’ve found a good way to sort and fix bugs is to add logging lines to the console, then copy and paste the log output back into the Pull Request chat. If you are really stuck you can also paste your logs and the files into Claude Opus 4.5 and get him to work out the fix, and to provide a commit for CoPilot to sort. CoPilot is basically your junior development and Claude the senior.
To make things easy for you, it’s worth adding a “debug” mode early on. This can be “off”/false by default but turned on by an environment variable you set as true for just the non-production environments (e.g. DEBUG=True). To do this you can ask that debug logging is added as we go and turned on/off by the environment variable mechanism.
Glossary
AI (Artificial Intelligence) — Systems or models that perform tasks normally requiring human intelligence, such as reasoning, pattern recognition, or language understanding.
AWS (Amazon Web Services) — A cloud platform offering compute, storage, and infrastructure services developers use to deploy and scale software.
CSS (Cascading Style Sheets) — A styling language used to control the layout, colours, fonts, and visual presentation of web pages.
LLM (Large Language Model) — A large-scale neural network trained on text to generate and understand language in a human-like way.
MVP (Minimum Viable Product) — The smallest coherent version of a product that delivers value and allows rapid learning from real users.
RLS (Row-Level Security) — A database feature that restricts which rows a user can read or modify by enforcing access policies directly in the database layer.
“One-shot” — A prompting or learning setup where the model is given exactly one example to infer the pattern or behaviour required.
UI (User Interface) — The visual and interactive layer through which users engage with an application.
URL (Uniform Resource Locator) — A unique address that identifies the location of a resource on the internet.
“Vibe-coding” — Rapid, intuition-driven development where you let the emerging feel of the project guide implementation rather than rigid planning.

One thought on “Vibe-Coding – A Practical Guide”