It’s taken me a long time to get a continuous integration (CI) / continuous delivery (CD) pipeline working with GitHub Actions. This post explores what I ended up with, with the hope others scratching their heads might stumble upon it. It isn’t perfect and there are still inconsistencies and things to fix, but it is at least working. It also allows a functional CI/CD pipeline on the cheap, with little cost and lots of power (“take that, cloud providers!”).
(AI) TL;DR
In developing our CI/CD pipeline with GitHub Actions for AI applications, I’ve distilled several key insights to aid others in creating efficient, cost-effective workflows:
- GitHub Actions: Chosen for its simplicity, thorough documentation, and cost-efficiency, it’s excellent for both private and open-source projects, streamlining development without the hefty price tag of cloud services.
- Docker: Essential for AI development, Docker simplifies dealing with complex libraries and ensures consistent environments, enabling scalable and modular deployments.
- Branching and Versioning: A clear strategy here ensures code stability and simplifies update management, keeping development organized and trackable.
- Development Process: Utilizing GitHub Issues for task tracking and feature branches for development ensures that every code change is tested and validated, with GitHub Actions automating everything from linting to Docker image deployment.
- Staging to Production: The staging phase is vital for testing AI applications in a production-like environment, with specific GitHub Actions and scripts streamlining this transition, ensuring thorough testing before live deployment.
These insights aim to streamline the CI/CD process for AI applications, balancing development speed with code quality and reliability.
Background
Why CI/CD?
The aim is of CI/CD is to allow developers to get on developing while maintaining high code quality levels. A well-structured CI/CD pipeline not only speeds up the development process but also significantly reduces the chance of bugs and errors making it into production.
The idea is that we automate running a good quality test suite against our code and only update when the tests pass. I’ve found this essential for any project bigger than a few files. The tests help catch breakages so they can (mostly) be fixed prior to any deployment in production. You can also automate deployment so things that pass the tests can automatically become available.
Quick diversion – “in production”
As a self-trained person I often see “in production” bounced around a lot without much explanation of what this actually means.
The answer is often different things depending on the project. For a public-facing web site or service it means that the site or service is accessible to the public. For an internal commercial project, it means that the project output is available to be used by proper users. If your project is control software, it means it is deployed in whatever devices you are controlling. Often it’s short for the code being “out there” and usable “in the wild”.
Why GitHub Actions?
I like using GitHub for hosting code.
I work on both private (proprietary) code bases and open-source (public) repositories. It has a good level of documentation and is mostly free. It allows me not to worry about hard drive fires in my local machine – the code is all backed up off-site.
Yes, there are criticisms of code being read in the big Microsoft machine, but if you are not a direct competitor I don’t see that as a big risk. I like open-source but I’m not a zealot so don’t care about the politics. I’m not doing anything illegal. Etc.
GitHub Actions are a good way of integrating CI/CD processes with normal sequences of git pushes and pulls. They enable you to run scripts that are triggered by changes in your repositories. I find them easier to use and more transparent than many “cloud” providers (*cough* AWS *cough* Azure *cough* Google *cough*).
Docker
After years going on and off, I’m finally resigning myself to the fact that containers are the best way to develop web applications.
Some reasons:
- Many “AI” libraries require a complex stack.
- This includes the need for GPU support, normal PIP installs, and system packages.
- If I say “OpenCV”, “PyTorch”, “CUDA”, “Tesseract”, “Graphviz”, or “databases” and you flinch, I know you know.
- Using Docker containers allows you to precisely control the system and Python stack.
- Many “AI” libraries are HUGE.
- Everything is a couple of GB.
- Having a way to cache downloads and installs becomes vital, even with fast internet connections.
- Allows syncing of local and remote.
- Theoretically operation in a local Docker container should be the same as operation in a remote Docker container.
- Allows Modular Deployment to the Cloud.
- You can use containers with Kubernetes and other cloud orchestration frameworks. Both AWS and Azure allow you to deploy containers.
- You can also easily scale and load balance by shuffling around containers and traffic flow to the containers.
Remote Servers & “AI”
In the early days of “AI in production” (2017-2022?) there weren’t that many GPU server options available for regular developers. Azure had a few after a while but they were poor spec and very expensive ($1000-2000/month). It was thus cheaper to build a custom GPU server (like early web days!). You could recoup costs in a few months with a basic Linux server rack, and some consumer GPUs.
(Of course Nvidia got wise to this and became one of the highest market cap companies by flogging versions of the consumer GPUs to corporate tech for $$$).
Even in 2024, for small applications (e.g., inside companies with hundreds or thousands of users or on websites with less than 10,000 users), it’s still often cheaper to build your own GPU server for AI applications. (Just take a look at the server pics from /localLlama or /StableDiffusion.)
This does present some issues. Cloud providers have a hugely complex orchestration procedure (that gives headaches and often doesn’t work) but at least they provide a set of (ever-changing) SDKs and command line tools. They make sure to make it easy to get stuff into the cloud (just not to get it out again). There are thus lots of cookie-cutter implementations on GitHub Action marketplace. Getting a deployment into a custom server is harder though. Normally, we just have SSH. Luckily the same procedures apply whether we are considering a Raspberry Pi or a server rack in a data centre. It’s just a little fiddly.
Branches
Through trial and error I’ve come at the following branching strategy that works well for me.
You define two main branches: a main branch for production and a development branch for integration. You then have feature branches off development for individual tasks.
This setup ensures stability in production and provides a sandbox environment for testing new features and fixes.
- Main Branch (
main): The source of truth for production-ready code. - Development Branch (
development): The integration point for features and fixes. - Feature Branches: Dedicated branches for developing new features or bug fixes.
This also works well with GitHub Issues. I like to use the “Create a branch” option on an issue, then select “Change branch source” and select the development branch then choose the “Checkout locally” option.
In my IDE (Pycharm Pro), I can then fetch the remote and checkout the branch generated for the issue. The branch has a name that corresponds to the issue that I find very helpful in keeping track of things.


Versioning
When developing quickly, it’s very useful to know what version of something is running and what version of something was used to generate data.
There are a large number of complicated tools that will offer to track and manage versioning (in addition to git). However, I haven’t found anything that is simple to use or worth any money.
I thus often just use a text file called version.txt that I pop in the project root directory. I can then read and write to that to manage the version. (Options for the future to explore are git tags for this.)
I settled upon a three level versioning system – x.y.z.
- The lowest level
zis incremented for every new low-level feature or bug-fix branch. - The next level
yis incremented following every larger increase in functionality (including possible breaking changes). - The last level
xis then reserved for large breaking changes in functionality or the code base (or transfers of responsibility etc.).
At the moment I don’t have anything that automatically increments the number but it seems entirely possible to rig something up via GitHub Actions. Each merge to development increments z and each merge with main can increment y (and/or z for bigger updates).
Docker Tag Framework
I also have come to a Docker image tag framework that reflects the versioning as well as different stages in development.
This could be better but this is where my trial-and-error approach is at the moment.
The Docker image tags are one of:
x.y.z_dev– development version of updatex.y.z- This has passed tests in the development CI/CD process
x.y.z– main (deployed) version of updatex.y.z- This has passed tests in the main CI/CD process
staging– the latest image ready for staginglatest– the latest production image- This has passed development and main CI/CD tests and is ready to be deployed or is deployed
previous_up– the last working deployed image- This is for rollback and restoration if anything goes wrong
- It is created automatically prior to any deployment
You’ll see how these fit in below.
Development Process
Given these branches my development strategy is thus:
- Get stuff out of developer’s head and into GitHub Issues
- Add a new feature/bug-fix branch from the Issue as above
- Work locally on the feature/bug-fix branch (one or more commits)
- Add tests associated with the new feature/bug
- Ensure all existing and new tests pass locally
- When happy, submit a pull request into development
I find Issues to be a great way to keep track of things that crop up. I tend to add them following errors I encounter and/or based on feedback from users. If you are running a public repository issues may be submitted by random folks on the Internet.
Here’s a diagram that sets out the process (click for bigger version):

CI/CD on Development
A new pull request on Development triggers a set of GitHub Action workflows.
A first workflow runs linting and the project test suite on the GitHub Action server. It also builds the Docker images and if the tests are successful pushes them to a remote docker repository.
Here’s the process:

And here’s the Action definition:
name: Development Build, Test, & Docker Push

on:
  pull_request:
    branches:
      - development
  push:
    branches:
      - development

jobs:
  lint:
    runs-on: ubuntu-latest

    steps:
    - name: Checkout code
      uses: actions/checkout@v4

    - name: Set up Python 3.10
      uses: actions/setup-python@v5
      with:
        python-version: "3.10"

    - name: Install dependencies
      run: |
        python -m pip install --upgrade pip
        pip install flake8 pytest
        if [ -f requirements.txt ]; then pip install -r requirements.txt; fi

    - name: Lint with flake8
      run: |
        # stop the build if there are Python syntax errors or undefined names
        flake8 . --count --select=E9,F63,F7,F82 --show-source --statistics
        # exit-zero treats all errors as warnings. The GitHub editor is 127 chars wide
        flake8 . --count --exit-zero --max-complexity=10 --max-line-length=127 --statistics

  build_and_test_and_upload:
    needs: lint
    runs-on: ubuntu-latest

    steps:
    - name: Checkout code
      uses: actions/checkout@v4

    - name: Build container
      run: |
        docker build -t ${{ vars.IMAGE_NAME }}:latest_test -f compose/local/fastapi/Dockerfile .

    - name: Run tests
      run: |
       # Add secrets from GitHub storage to the test runner environment file
        echo OPENAI_API_KEY=${{ secrets.OPENAI_API_KEY }} >> .env

        docker-compose -f docker-compose-test.yml up --abort-on-container-exit

    - name: Login to Docker Hub
      uses: docker/login-action@v3
      with:
          username: ${{ secrets.DOCKER_HUB_USERNAME }}
          password: ${{ secrets.DOCKER_HUB_TOKEN }}

    - name: Push to Docker Hub as Version and Latest Test
      run: |
          docker tag ${{ vars.IMAGE_NAME }}:latest_test ${{ vars.IMAGE_NAME }}:$(cat version.txt)_dev
          docker push ${{ vars.IMAGE_NAME }}:$(cat version.txt)_dev

    - name: Push to Docker Hub as Latest Staging
      run: |
          docker tag ${{ vars.IMAGE_NAME }}:$(cat version.txt)_dev ${{ vars.IMAGE_NAME }}:staging_dev
          docker push ${{ vars.IMAGE_NAME }}:staging_dev
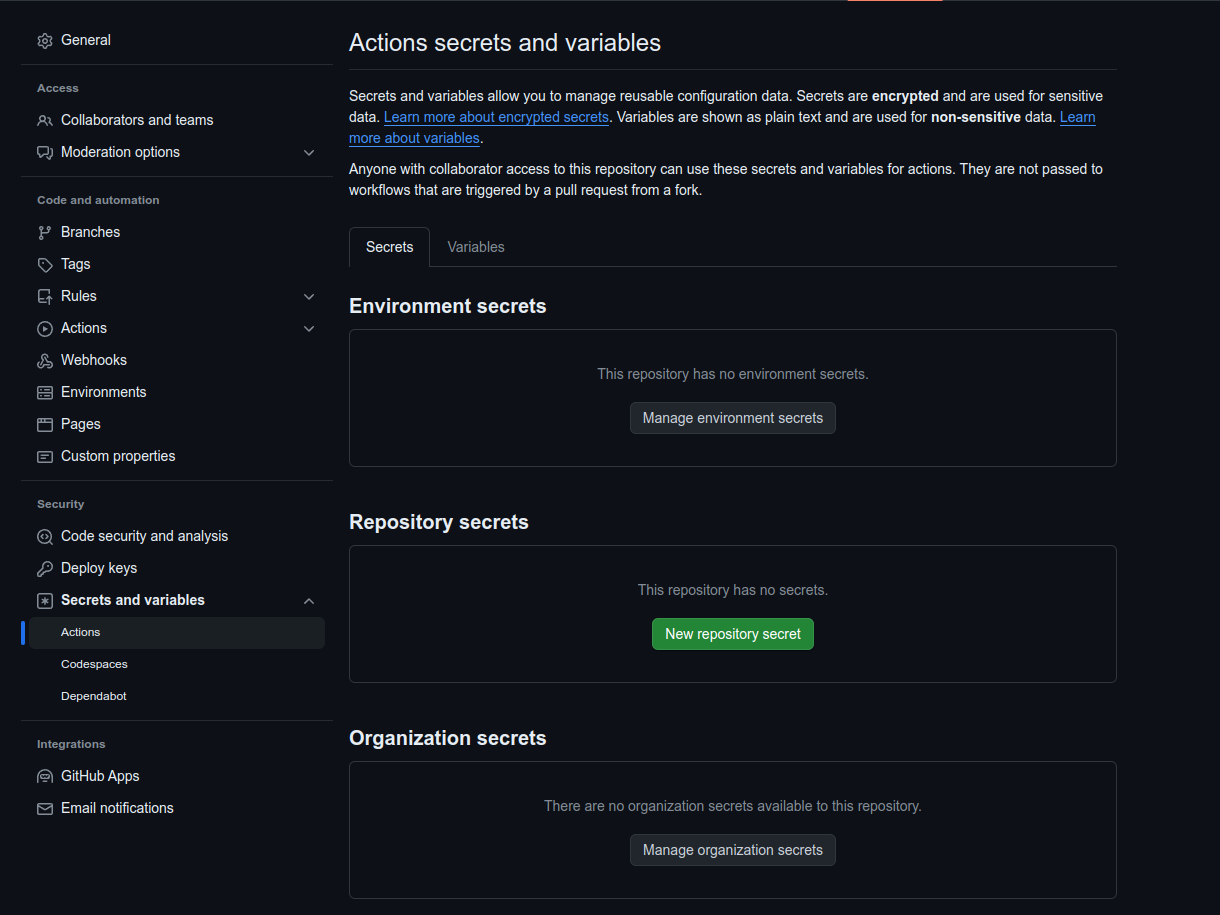
Secrets and variables are handled via GitHub. These can be added by going “Settings” > “Secrets and variables” (on the LHS) > “Actions”.
- Secrets are things you want to keep secret, like passwords, tokens, and API keys.
- Variables are stuff you don’t mind leaking (e.g., whether you have an “auto-deploy” option as “True” or “False”).
If everything runs okay, the development CI/CD process creates and pushes staging copies to the Docker repository.
Staging
“Staging” is a process of testing your code in a production setting without actually deploying to production.
This is especially important when running databases and/or AI libraries that rely on stuff like CUDA and local GPU hardware. Even though we are using Docker local conditions and environment variables can change.
However, the “staging” area should be isolated from your production code, so you can find breakages without breaking your production deployment.
So to setup a “staging” area, I typically generate a copy of my production code folder on the remote server (e.g., [project]_staging for staging code and [project]_production for production code). There is a docker-compose staging.yml file that sets out a staging configuration. This is a copy of the docker-compose prod.yml production file but with the network and volumes swapped to use staging copies.
I then define a bash script (e.g., run_staging.sh) that:
- Sets a timestamp for logging (
TIMESTAMP=$(date +%Y-%m-%d_%H_%M)) - Creates a log file (
> logs/${TIMESTAMP}_staging.log) - Redirects output to the log file (
exec > >(tee -a "logs/${TIMESTAMP}_staging_setup.log") 2>&1) - Gets the status of the production database container
- If the container is not up – spins it up
- Backs-up the production database (via
pg_dumpto a file) - Spins down any existing staging containers (
docker-compose -f staging.yml down) - Pulls the latest staging images (
docker-compose -f staging.yml pull) - Removes any existing docker volume for the staging database
- Creates a docker volume for the staging database
- Spins up the database container in the docker-compose project
- Waits till the database container is running and healthy
- Restores the production backup file into the staging database
- Spins up the rest of the staging containers (
docker-compose -f staging.yml up -d) - Upgrades the database by running (
alembic upgrade headin one of the containers viadocker-compose -f staging.yml exec -T [my_container]) - Runs the tests in one of the running containers (e.g., by
exec-ing `pytest –full-trace -vv -s –log-level=DEBUG`) - For web applications, runs one or more end-to-end Postman tests (
docker run -v $(pwd)/postman:/etc/newman -t postman/newman:alpine run [my_app].postman_collection.json -e [my_app_staging].postman_environment.json --color off) - Spins down the staging containers
Staging GitHub Action
You can run the staging process manually.
I originally started as a series of commands that were run individually.
As I added more commands to avoid different issues, I put it all into a script meaning I could be lazy and just run the script after SSHing into the remote server.
After a while I wanted to be lazier still and get the staging checks to run automatically as the last set of checks when merging a feature into the development branch.
Here is a GitHub Action to do that.
name: Deploy Development to Staging

on:
  workflow_run:
    workflows: ["Development Build, Test, & Docker Push"]
    types:
      - completed

jobs:
  deploy-to-staging:
    runs-on: ubuntu-latest
    if: ${{ github.event.workflow_run.conclusion == 'success' }}

    steps:
      - name: Install SSH Key
        uses: shimataro/ssh-key-action@v2
        with:
          key: ${{ secrets.SERVER_DEPLOY_KEY }}
          known_hosts: 'placeholder'

      - name: Adding Known Hosts
        run: ssh-keyscan -H ${{ secrets.SERVER_IP }} >> ~/.ssh/known_hosts

      - name: Deploy with Docker Compose
        run: |
          ssh ${{ secrets.SERVER_USERNAME }}@${{ secrets.SERVER_IP }} -p ${{ secrets.SERVER_SSH_PORT }}<<-EOF
          set -e
          cd /[my_project]_staging
          ./staging.sh
          EOF
        env:
          DOCKER_BUILDKIT: 1
The action runs when the previous Build, Test, and Push action completes following a pull request to the development branch.
I will say this took me a looooong time to get working. I tried a number of different SSH actions including https://github.com/webfactory/ssh-agent but I couldn’t get that to work.
After ssh-ing into the remote server (e.g., a Digital Ocean virtual machine or my Raspberry Pi or my home GPU server), I run the staging script. As this happens automatically, I can just concentrate on creating the Pull Request, then work on the next feature / bug-fix and come back later to see if the tests as run on the GitHub Actions server and staging have passed. If they haven’t passed, I can go back into the branch associated with the Pull Request and tweak. If they have passed, I can approve the merge into development and delete the feature/bug-fix branch.
Deployment
The process above means I (or a team) can work on several features that can all be collected on a non-deployed development branch that nevertheless is tested multiple times including on the deployment server.
When folks are ready to deploy to production, we can then create a pull request via GitHub to merge development into main. For example, you might want to do this every Monday after a week’s worth of developments. (Take it from my mistakes, deploying on a Monday is much better than last thing on a Friday!)
Here’s the process (click for bigger image):

Pull Request on Main
A pull request on main triggers a similar set of jobs to the development action set out above. The code is linted, build, and tested. It is then pushed as the latest Docker image.
If the tests pass, then there is a final human check. If a human then approves the merge of the pull request via GitHub, this triggers a push to main and the activation of a deploy action.
The deploy action is similar to the staging action but operates to deploy the latest docker images.
- It is triggered on a push to main (
on:\n\tpush:\n\tbranches:\n\t- main) - It ssh-es into the remote server, navigates to the production repository, and pulls the updated main code.
- It then runs a
deployscript similar to thestagingscript:- It backs up the current production database
- It pulls the most recent copies of the production Docker images (via
docker-compose -f production.yml pull) - It recreates the docker-compose project (e.g., via spinning down and up)
- It implements any alembic migrations
- It then runs the unittests on the deployed container (e.g., via
pytest) - It then runs Postman/Newman end-to-end tests
Advanced Traffic Routing
If you want to test your staging version in the wild, you can set up the staging docker-compose project to expose the web service on a different TCP port (such as 8000) and have both staging and production versions running in parallel.
If your TCP port is an implementation parameter you can alternatively spin up a new production container on a different port, and have this run in parallel with the old version of the production container and just switch over the traffic routing. You can then spin down the old version of the production container.
These kind of strategies can be coordinated with any load balancing strategy you use. All you are really doing is swapping around port routing, which makes things quite easy.
(AI) Conclusion
(I’m too lazy / unskilled to do a proper conclusion but “AI” (GPT4-turbo) is great at this!)
Crafting a CI/CD pipeline that efficiently manages the complexities of AI application development can be a daunting task. Through the exploration of GitHub Actions and the strategic use of Docker, I’ve outlined a framework that not only mitigates the inherent challenges but also leverages the strengths of these tools to create a streamlined, cost-effective development workflow. This approach emphasises the importance of a solid branching and versioning strategy, coupled with a meticulous development process that rigorously tests and validates code before it reaches production.
As we’ve journeyed through the intricacies of setting up a CI/CD pipeline, from initial development to staging and final deployment, the key takeaway remains clear: simplicity, efficiency, and automation are paramount.
By implementing the insights shared in this post, developers can navigate the complexities of AI development with greater ease and confidence, ensuring that their focus remains on innovation and quality, rather than being bogged down by the logistics of deployment and integration.
In closing, remember that the landscape of technology is ever-evolving. What works today may need to be adapted tomorrow. Stay curious, stay engaged, and let the continuous integration and delivery of your projects be a journey of constant learning and improvement. Together, let’s build a future where our technological creations are not just functional but are crafted with the highest standards of excellence and reliability.
(Yes, let’s craft our AI overlords so they don’t crash…)
